Replacing the Companion Kickstand
Using Cheelcare's kickstand changing tool

Allex Laurin
Last Update vor 4 Jahren
These instructions are intended for service technicians.
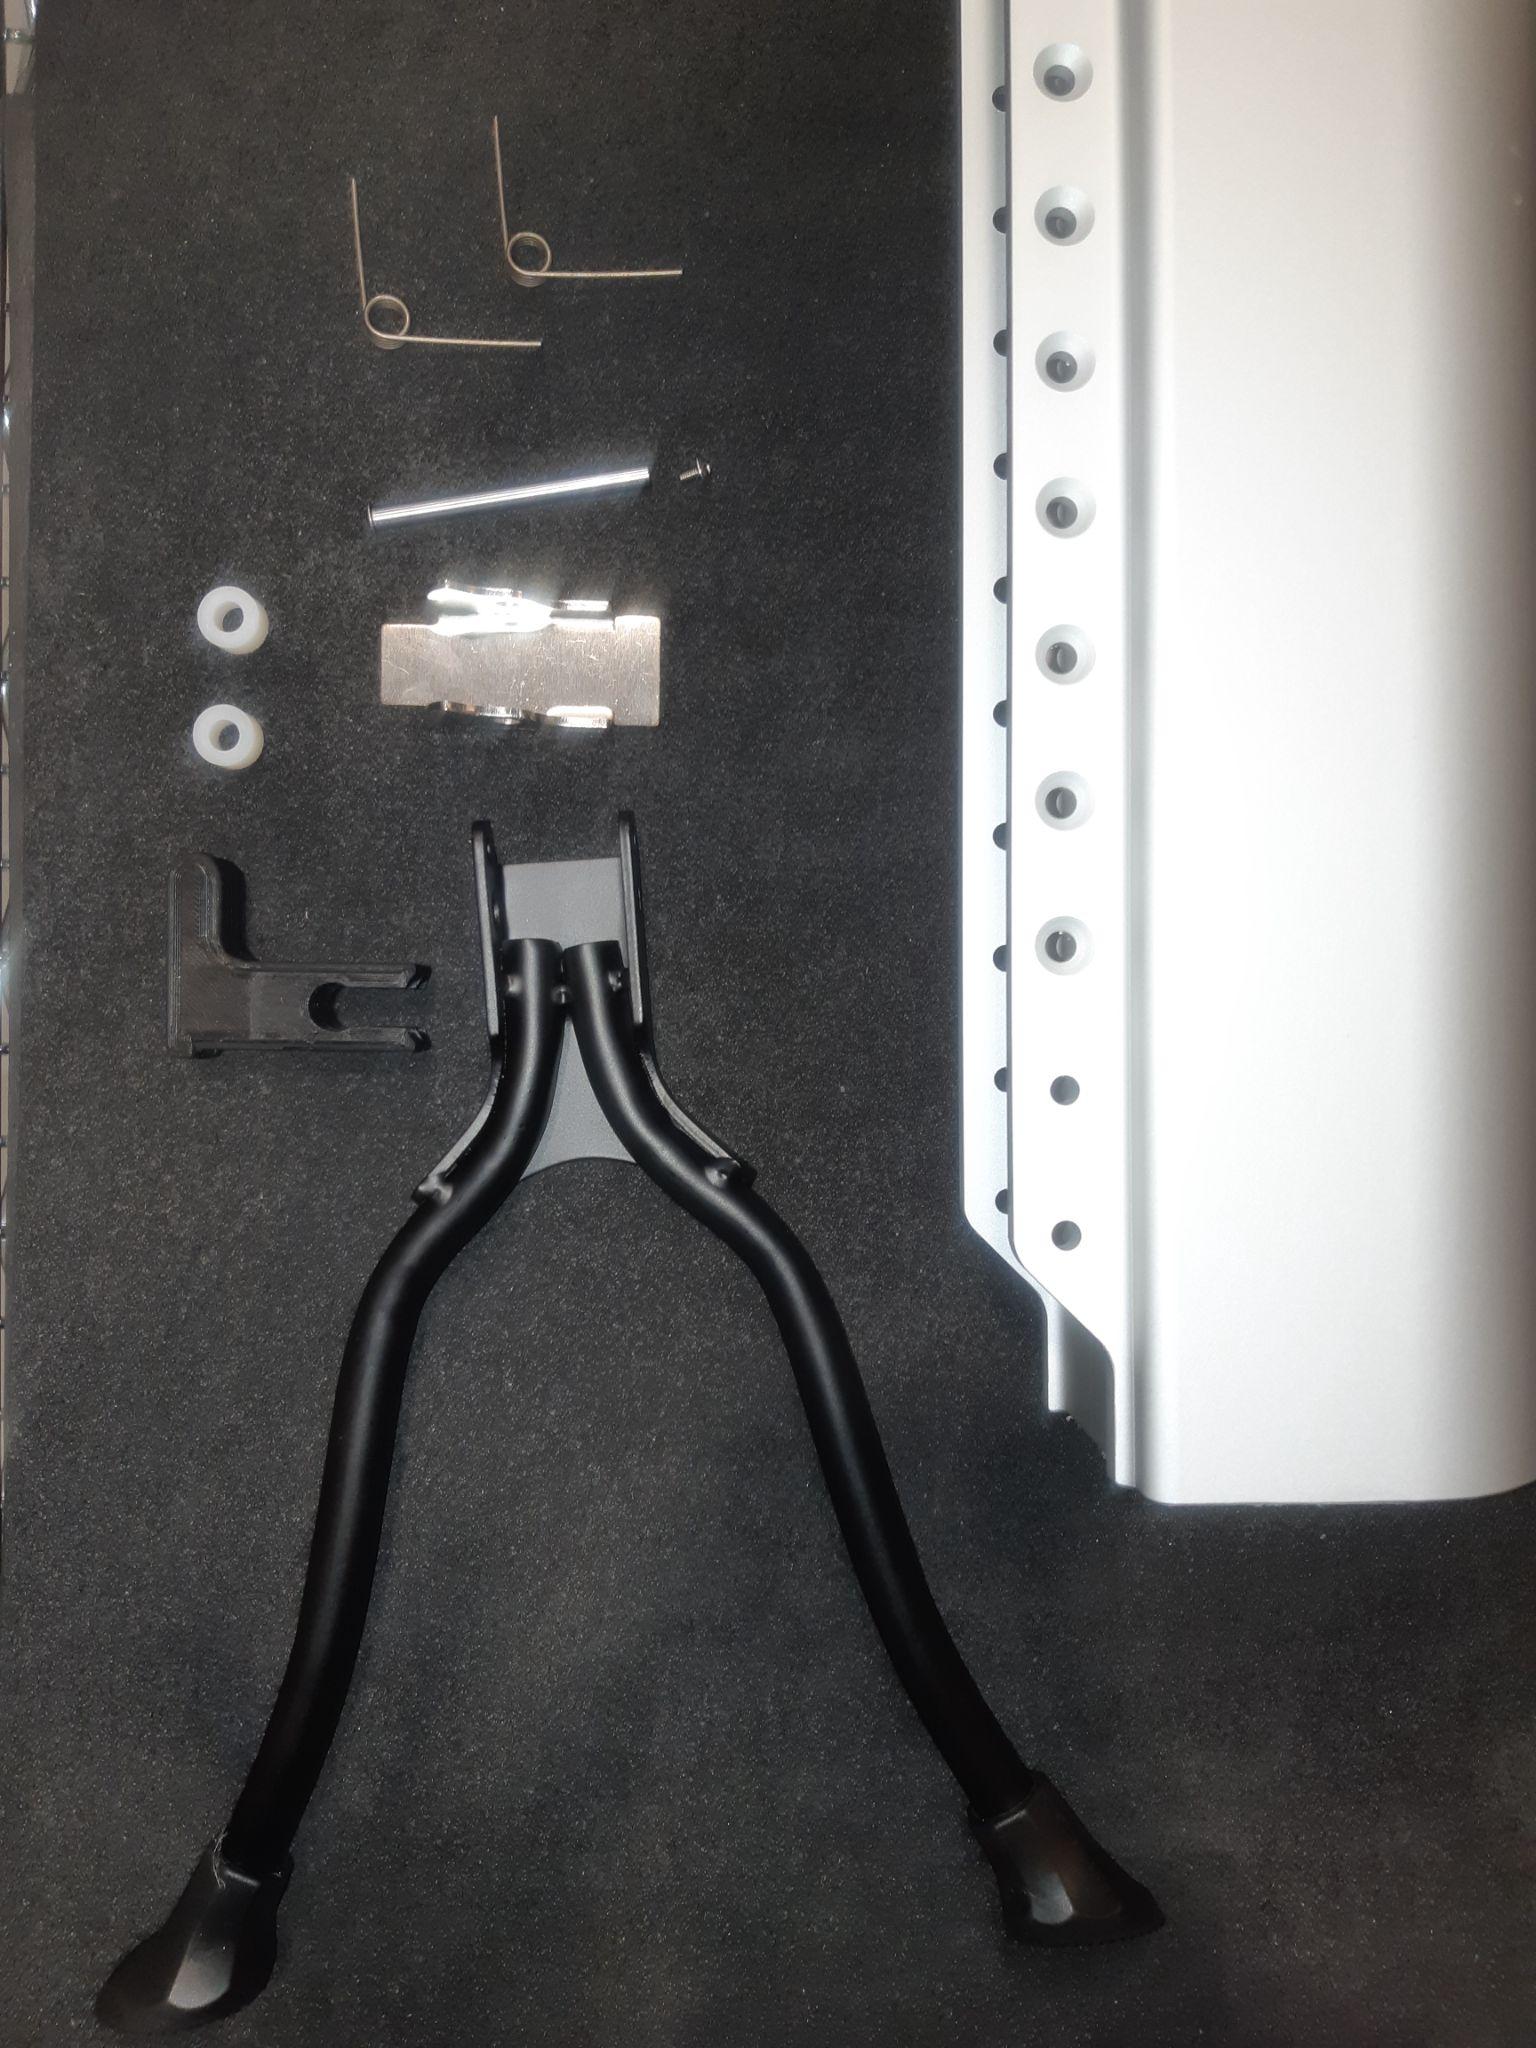
Part List
To perform the installation, you will need the following parts. They can be ordered from Cheelcare.
| PART NAME | QTY |
|---|---|
| Kickstand | 1 |
| Torsion Spring | 2 |
| White Nylon Spacer | 2 |
| Screw M3x5 Flanged | 1 |
| Shaft 5mmx59mm | 1 |
| Kickstand Limiter | 1 |
| Kickstand Changing Tool | 1 |
Step 1
Prepare your parts
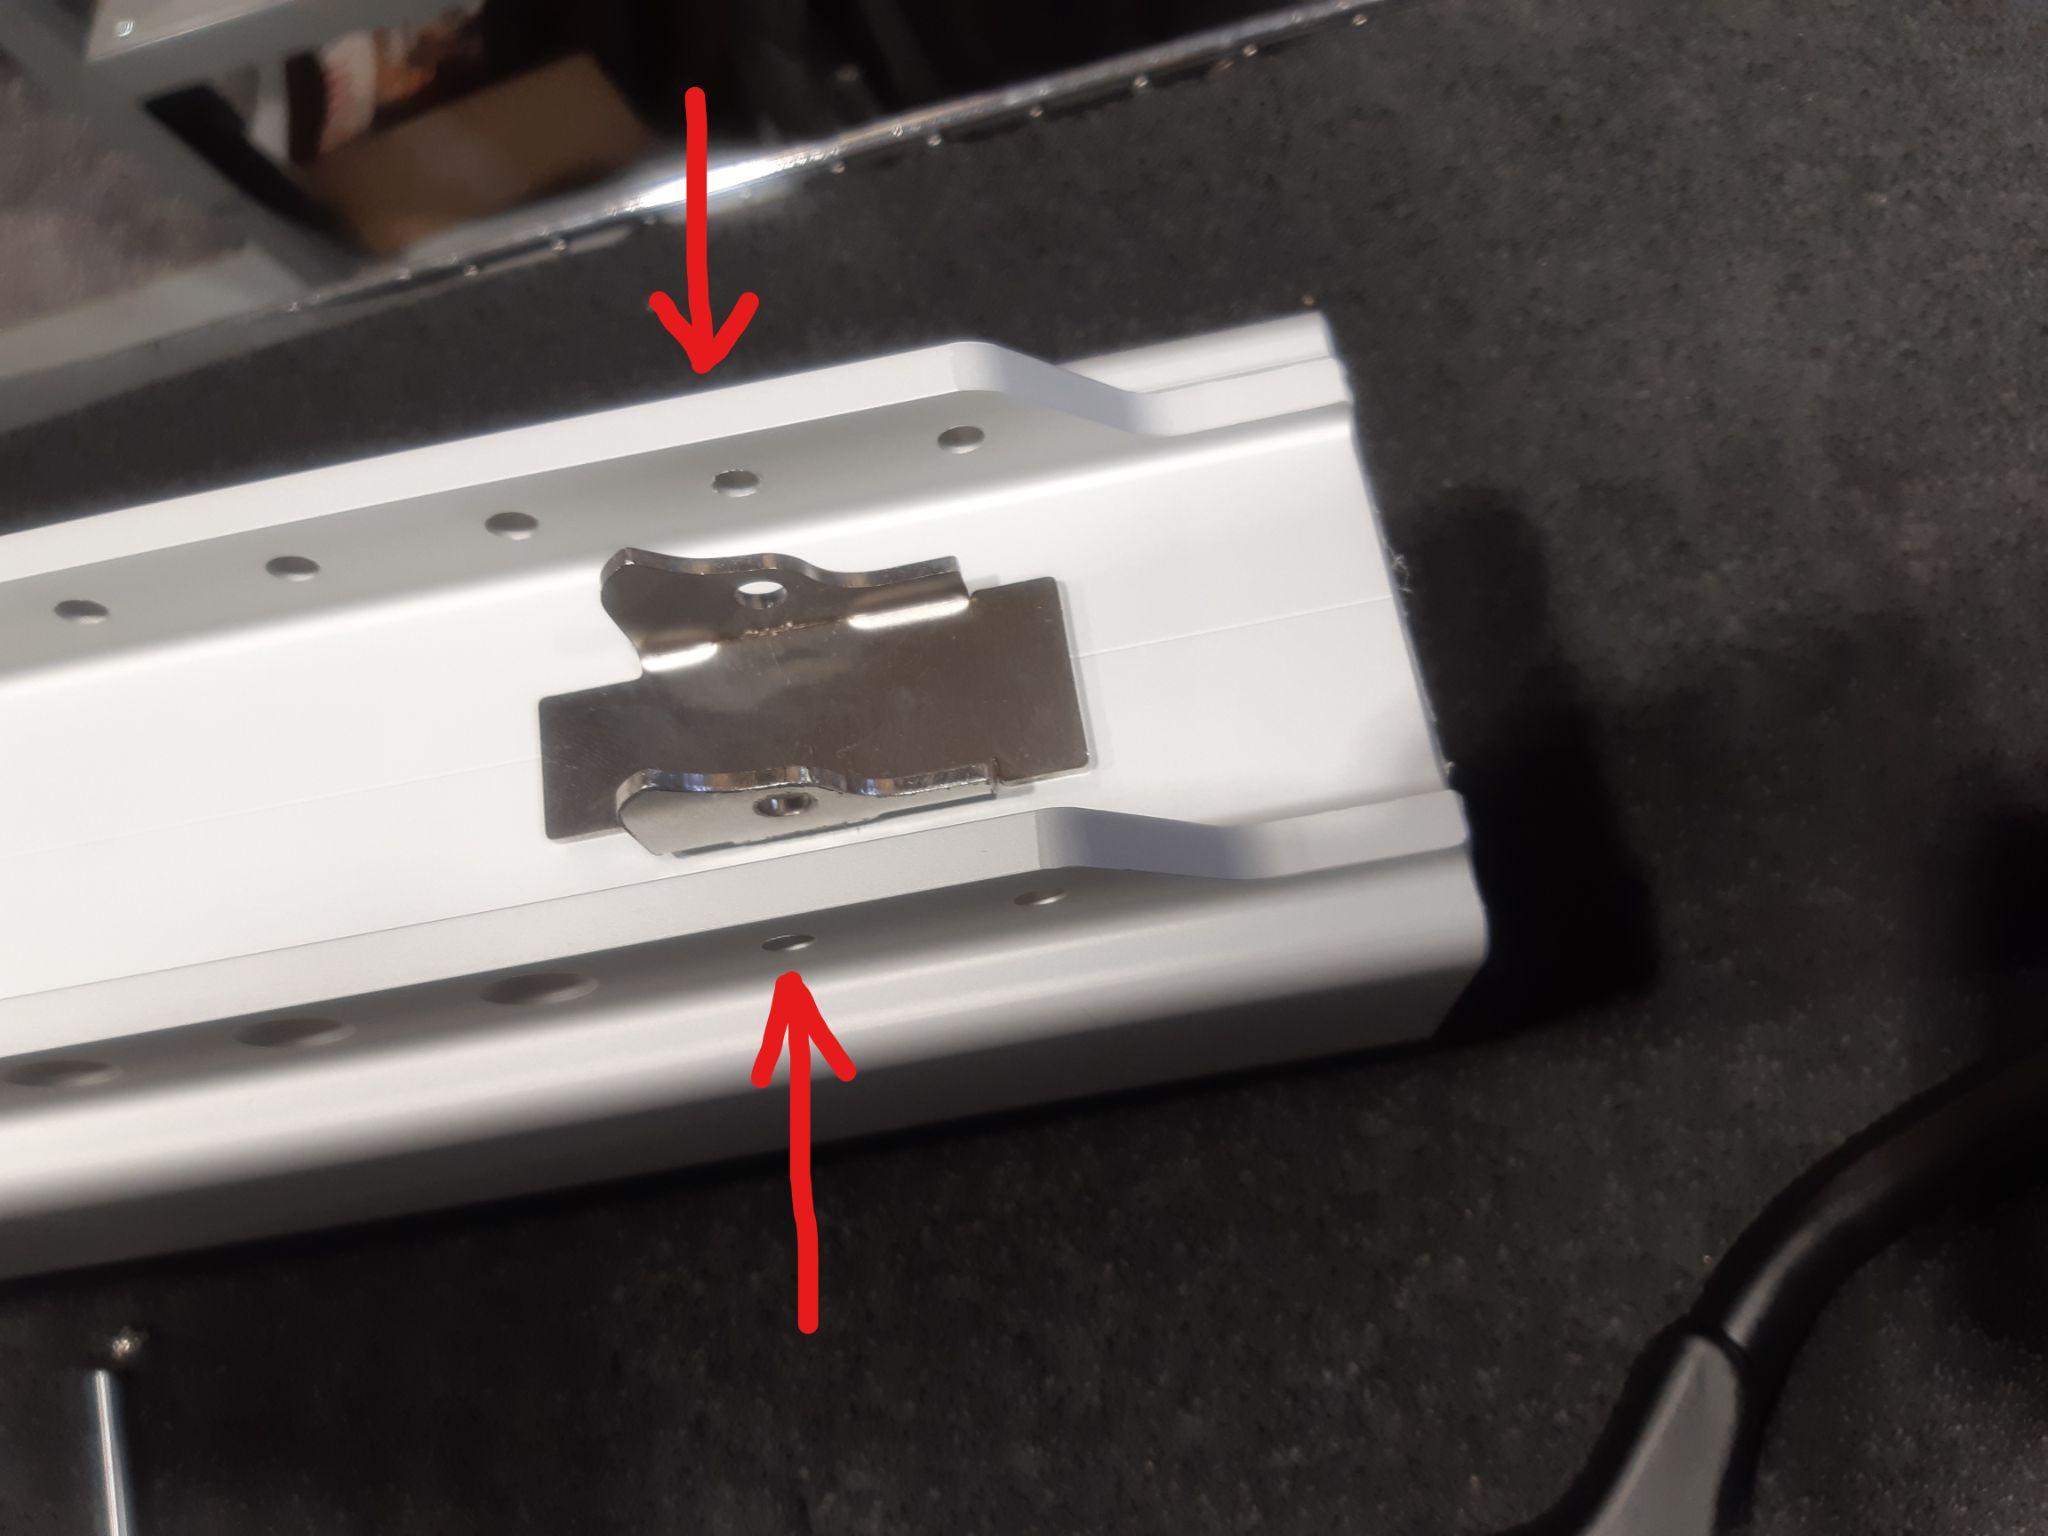
Step 2
Place the kickstand limiter onto the Companion Body. Align the limiter's holes with the second set of holes from the bottom of the Companion body as shown in the picture below.
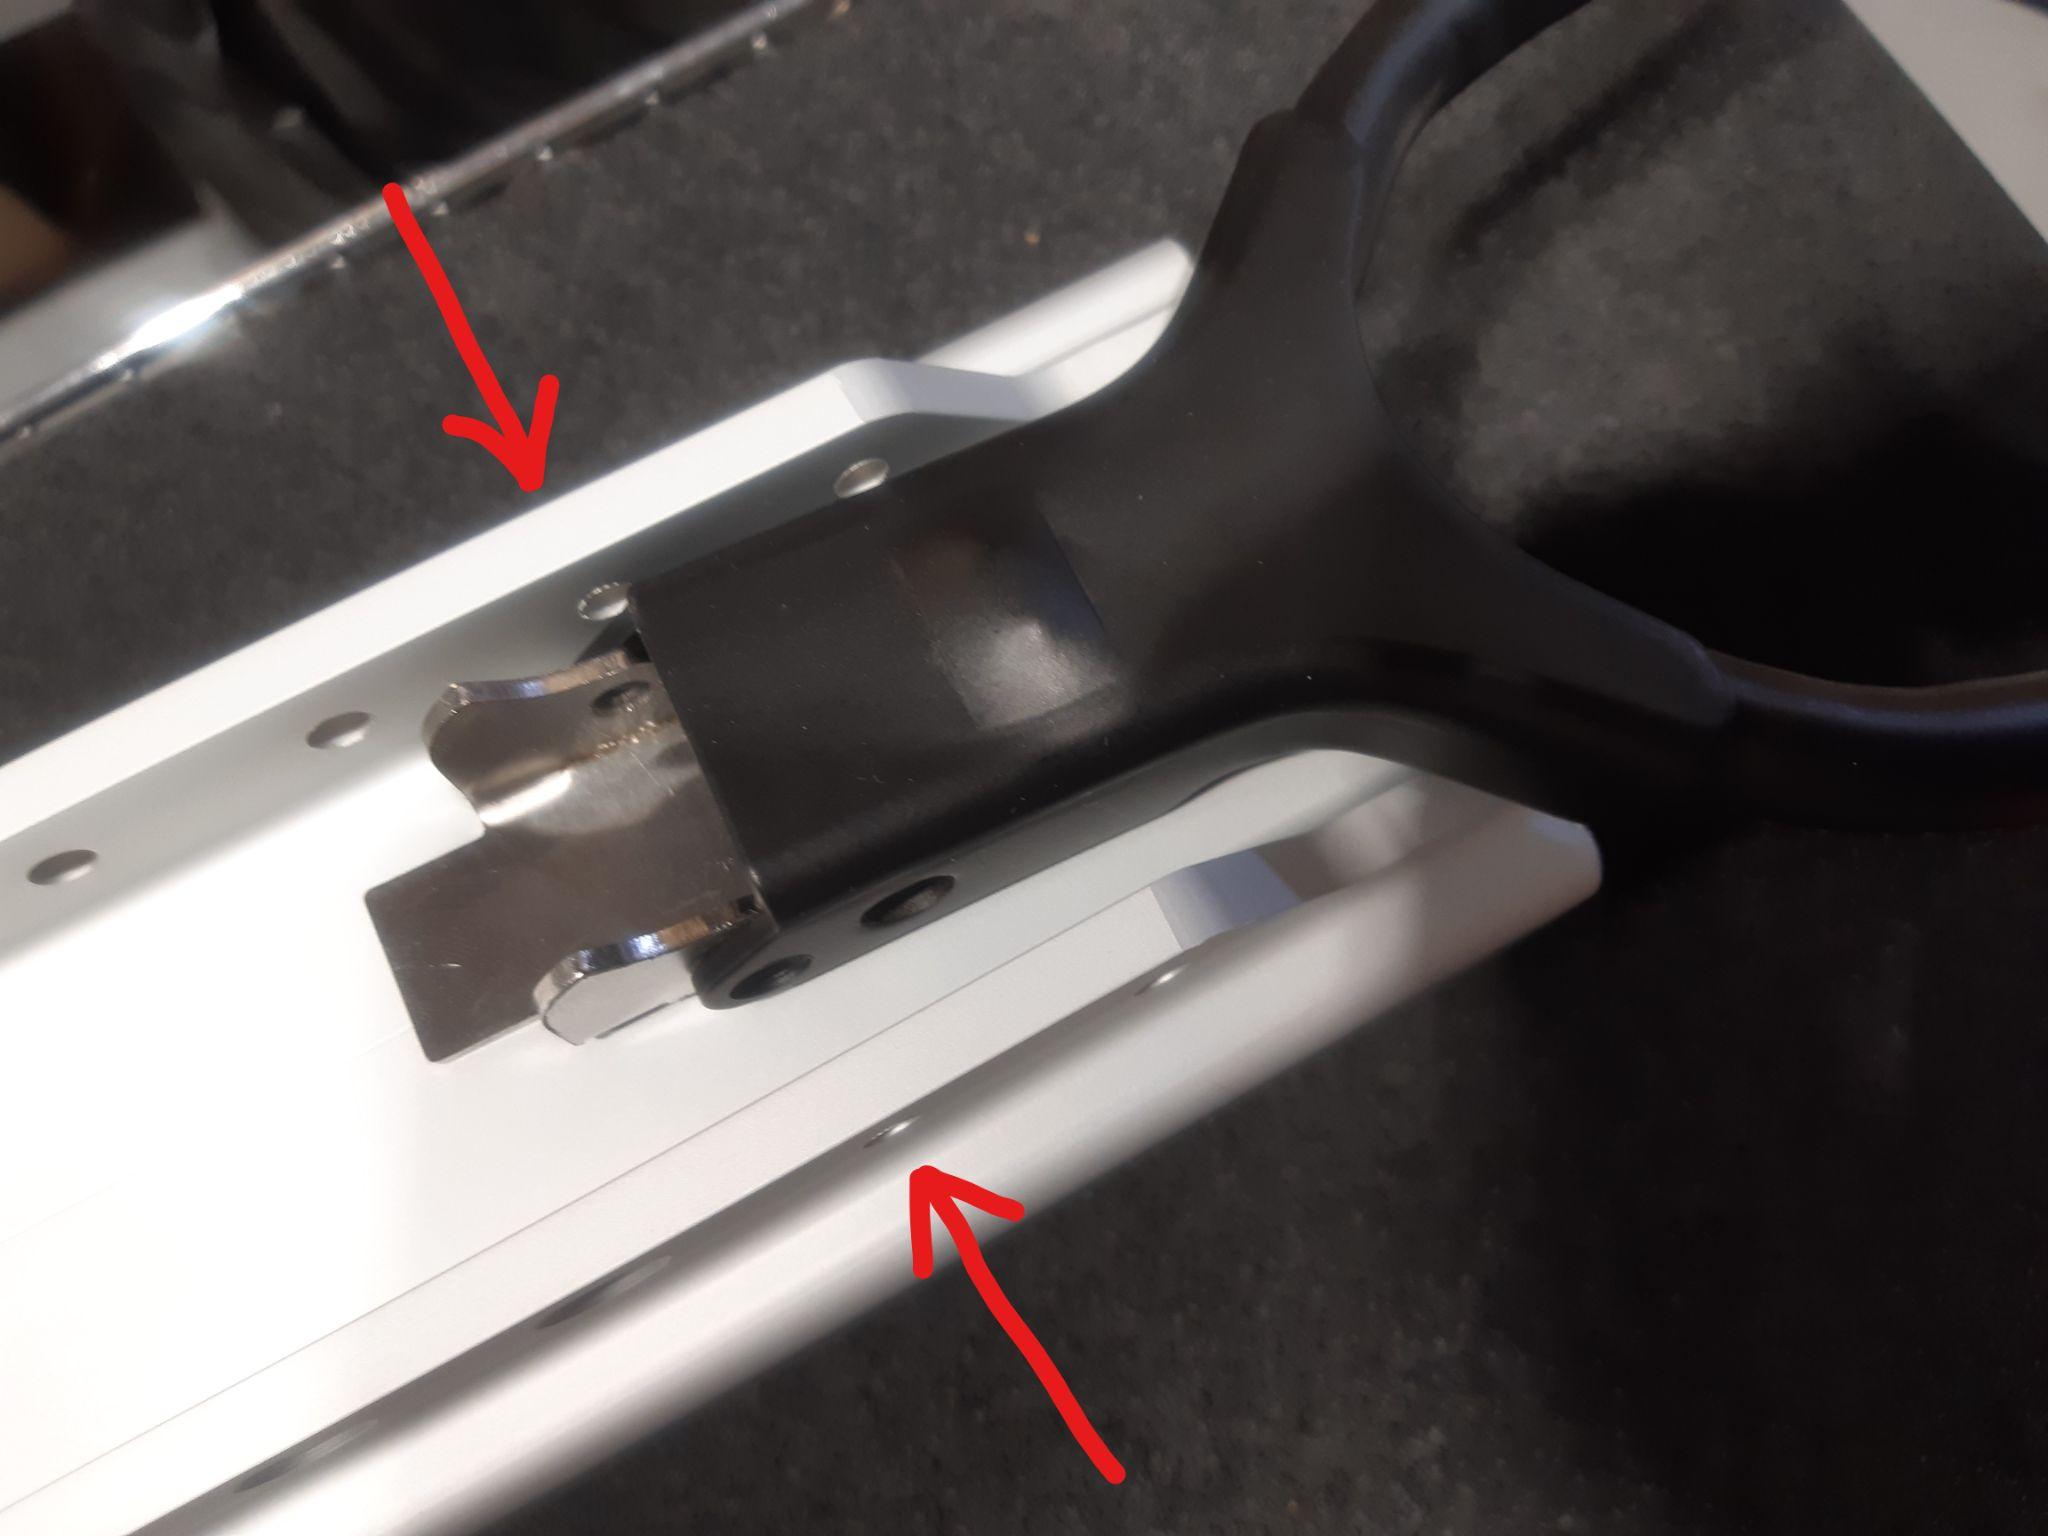
Step 3
Place the kickstand over the limiter aligning the holes of the kickstand, limiter, and body.
Step 4
Place the white nylon spacer in between the kickstand and the Companion body. When the spacer is lined up with all of the holes, slide the metal shaft through the holes until it matches the photo below - but not all the way through. You will be inserting parts in-between next.

Step 5
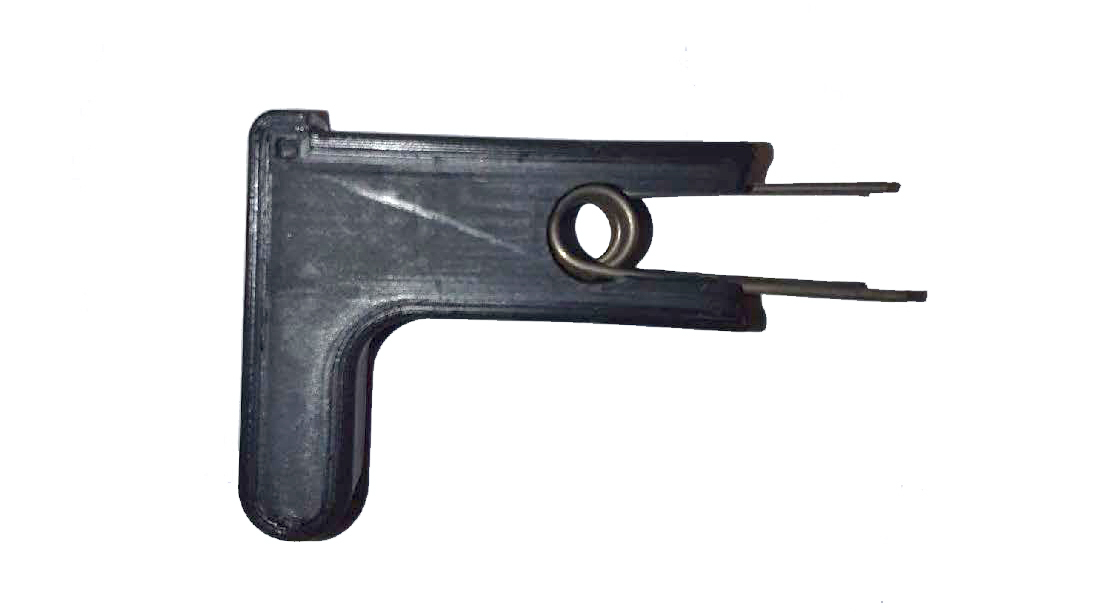
Prepare the kickstand changing tool: pinch the torsion springs and insert them into the changing tool until they are fully inserted.
*Be careful since the springs are now under tension.
Step 6
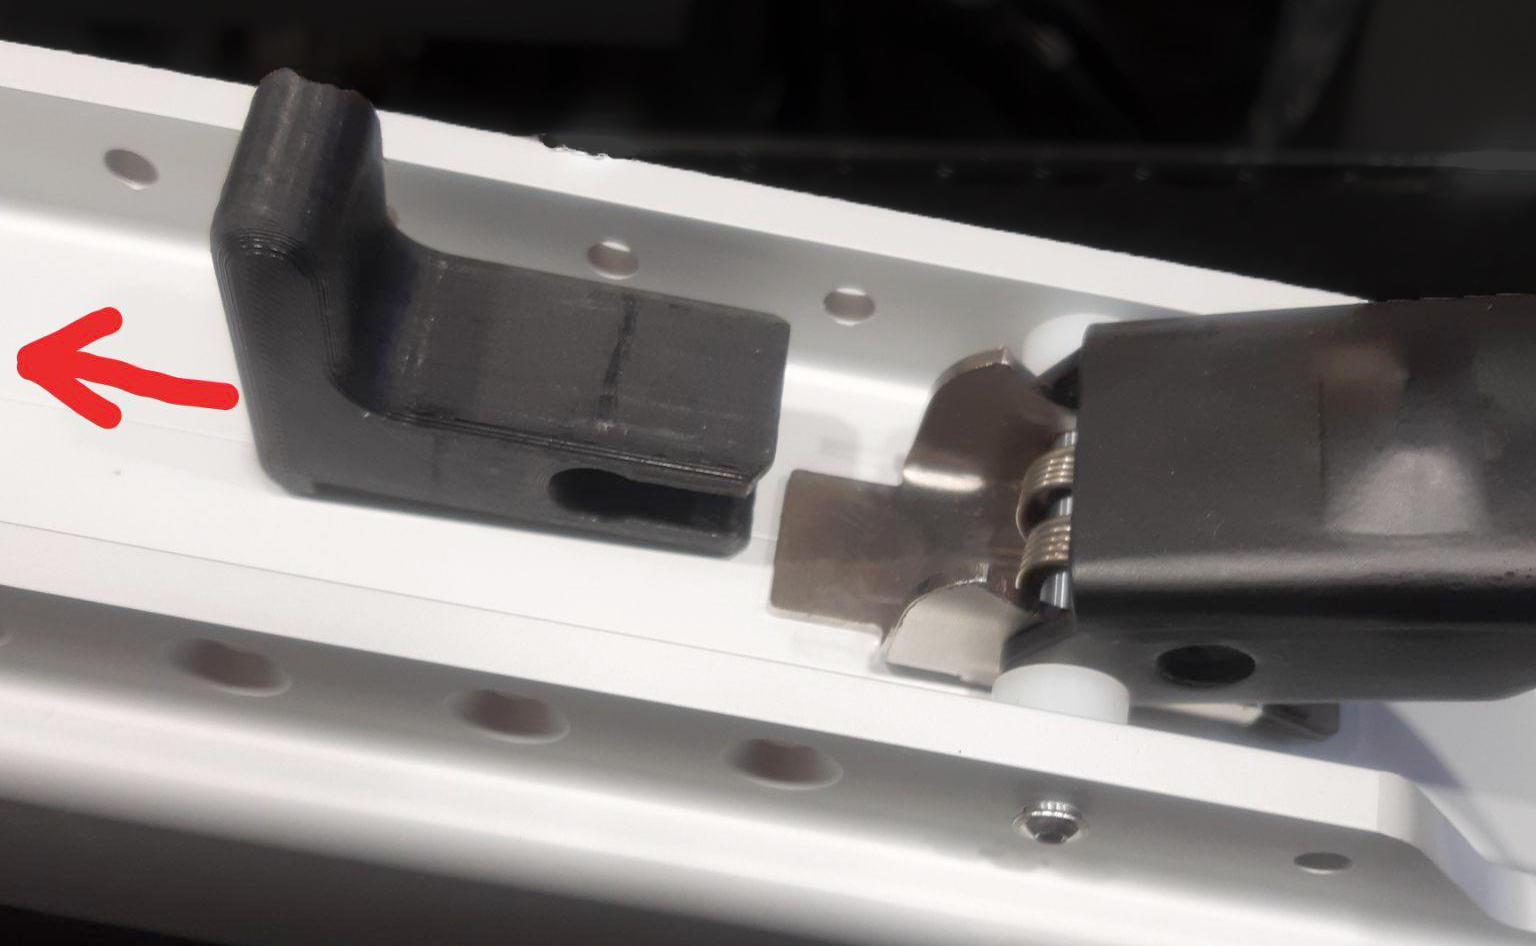
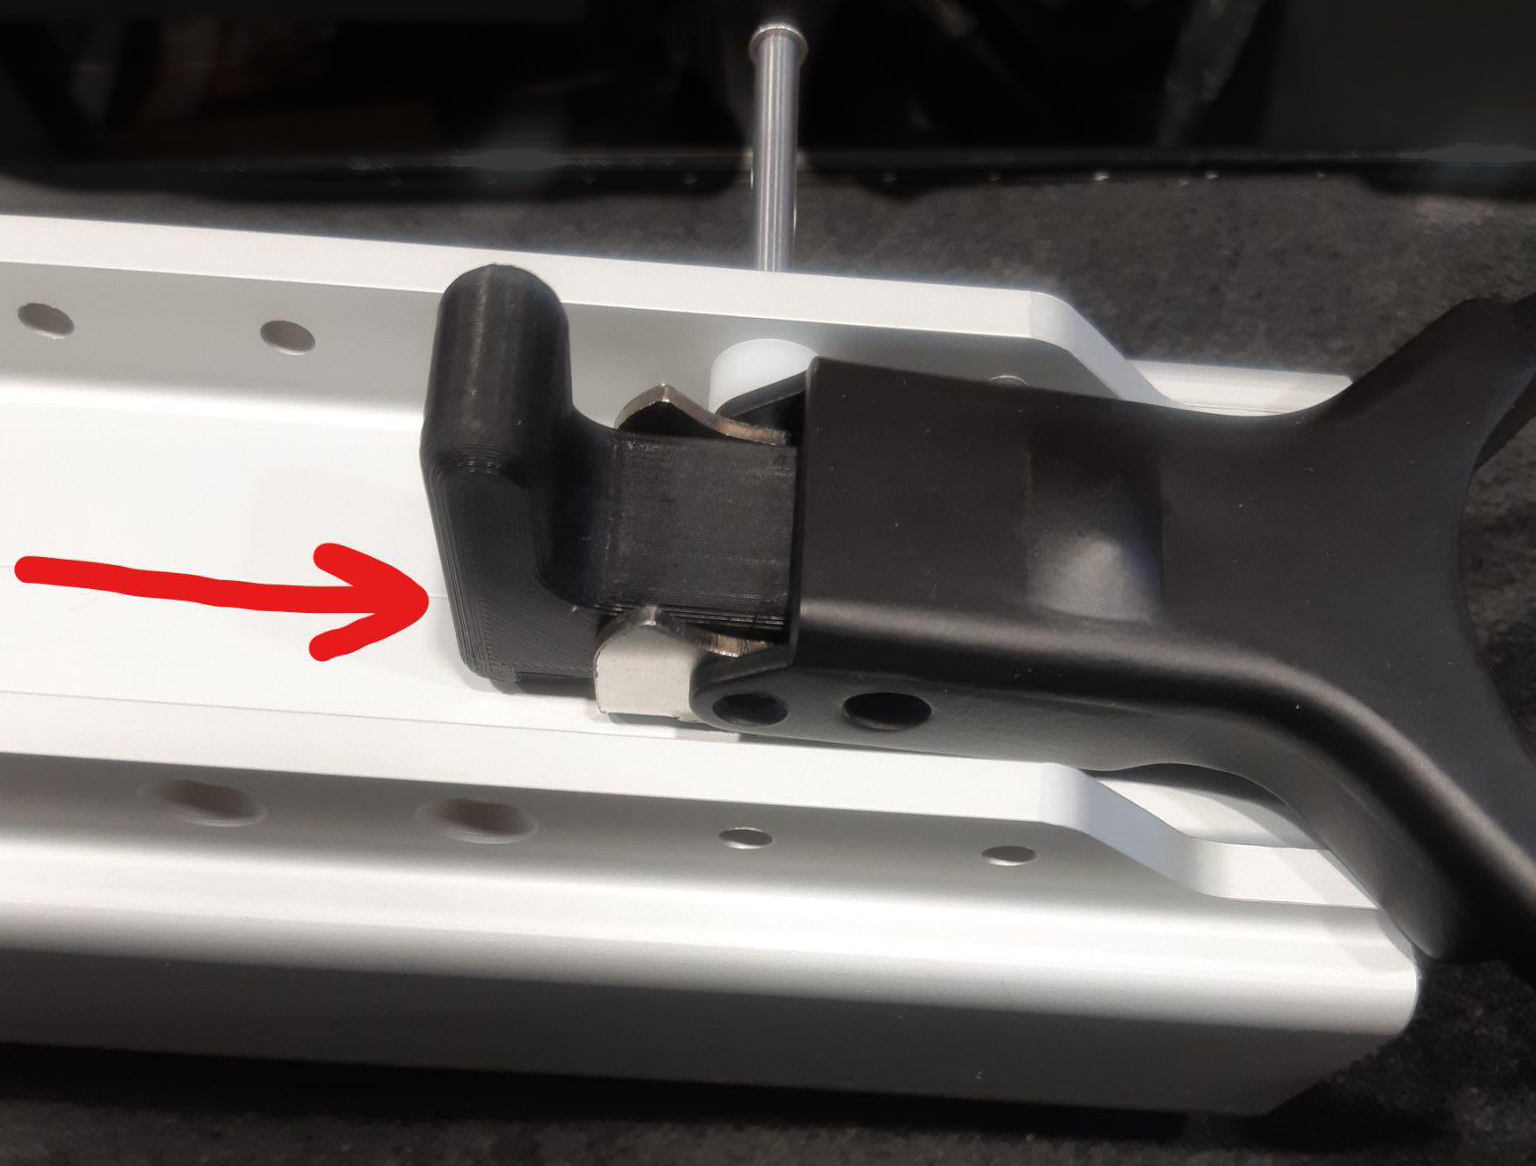
Place the kickstand tool onto the kickstand limiter.
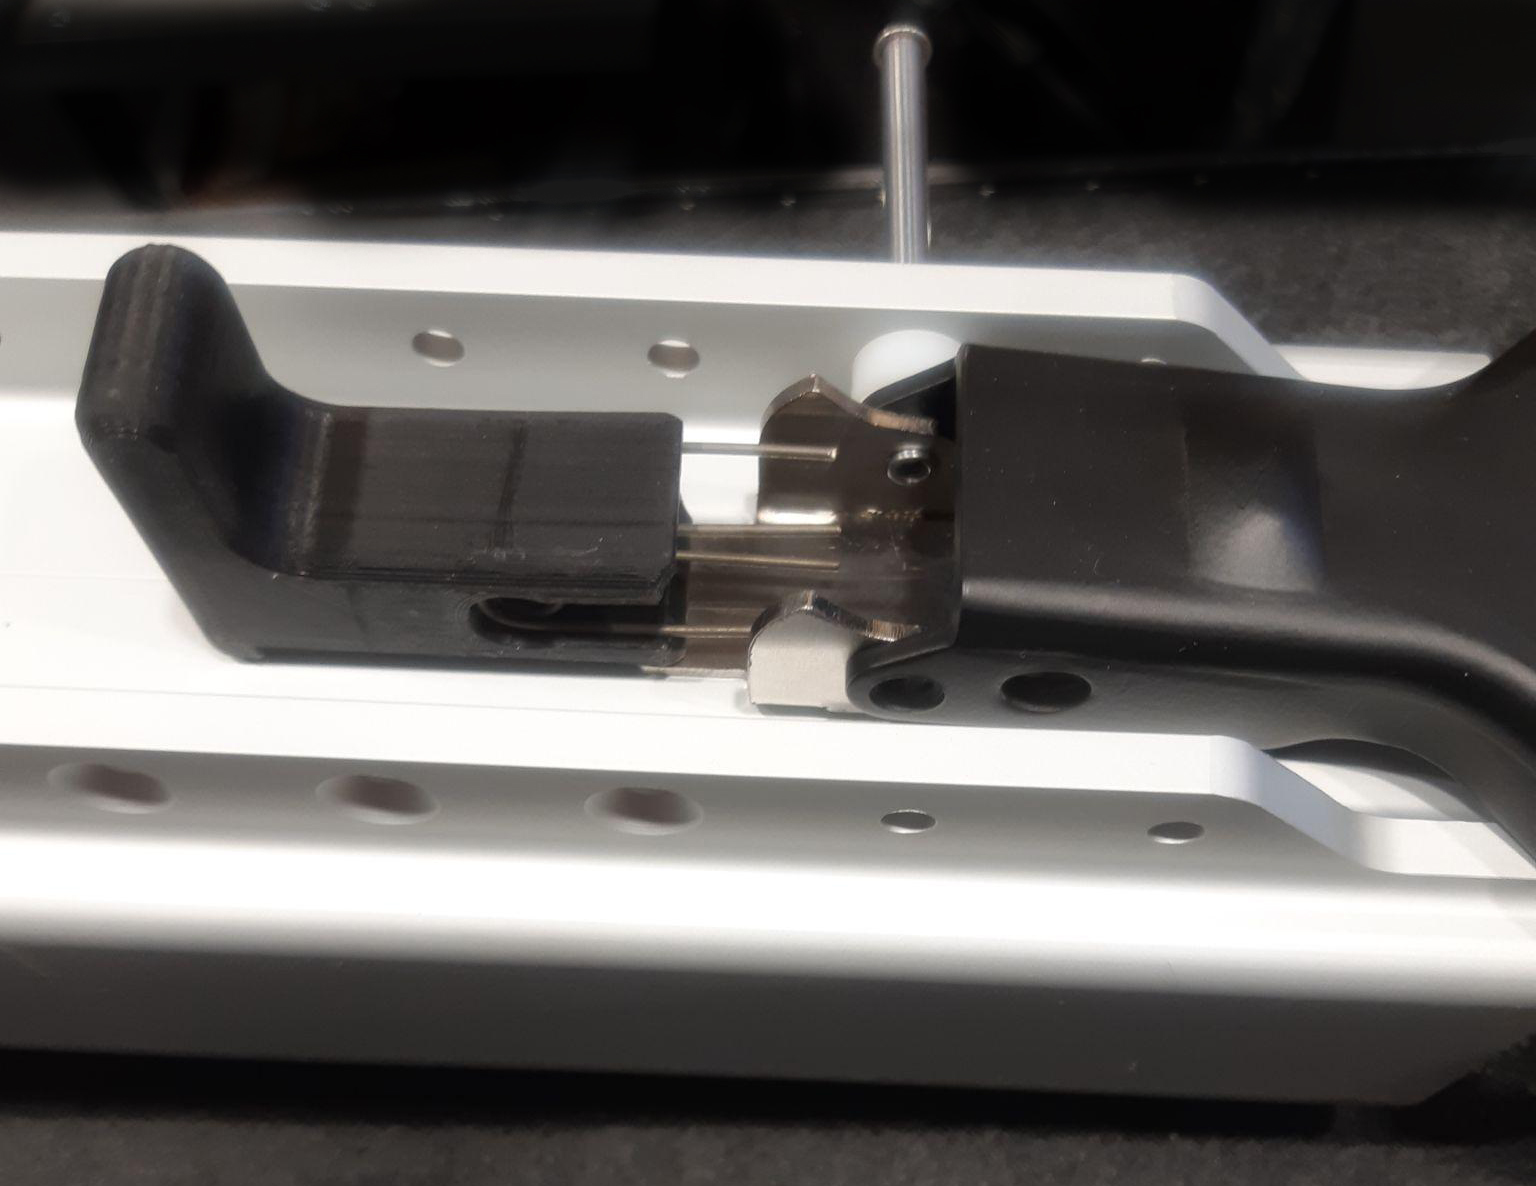
Step 7
Slide the kickstand tool into the kickstand limiter and align all the holes of the components together.
Step 8
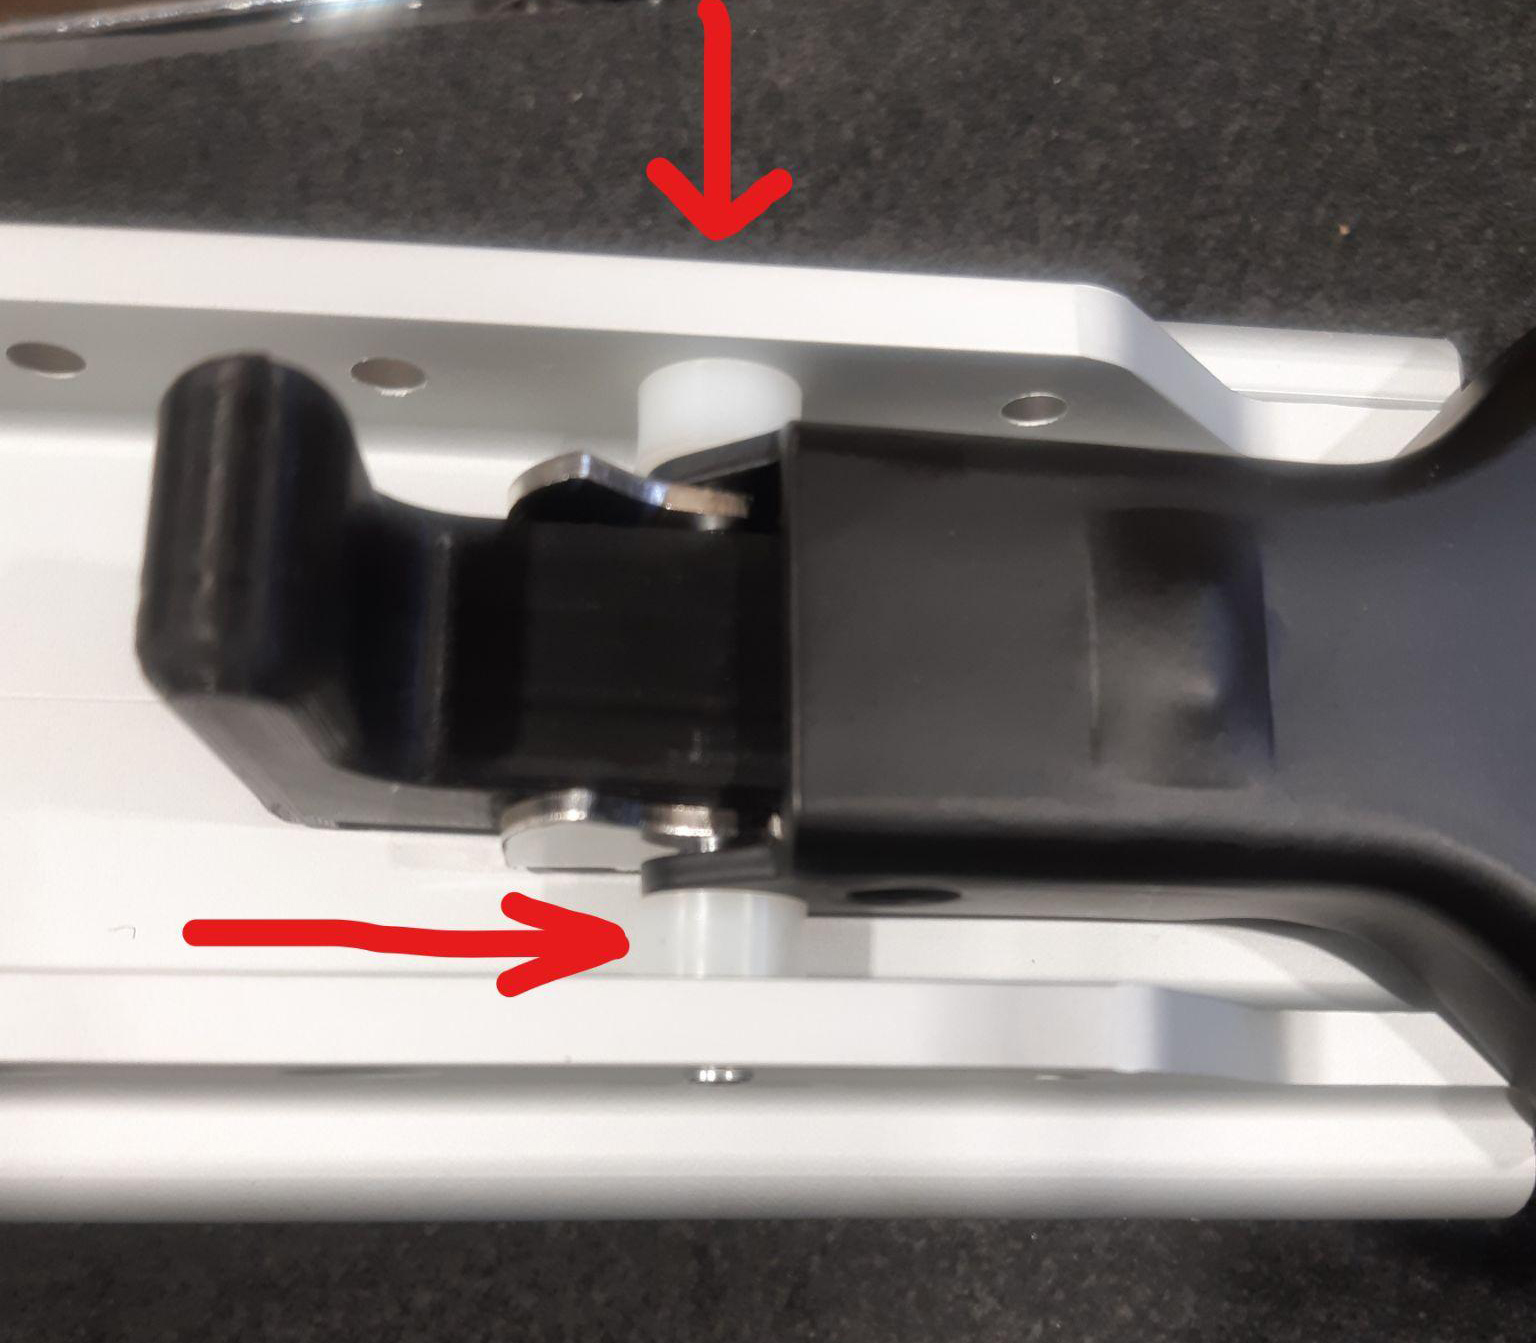
Continue pushing the metal shaft through the holes until you reach the opposite side of the kickstand, then place the remaining white spacer between the kickstand and Companion body. Finish pushing the metal shaft through to the other side of the Companion body.
Step 9
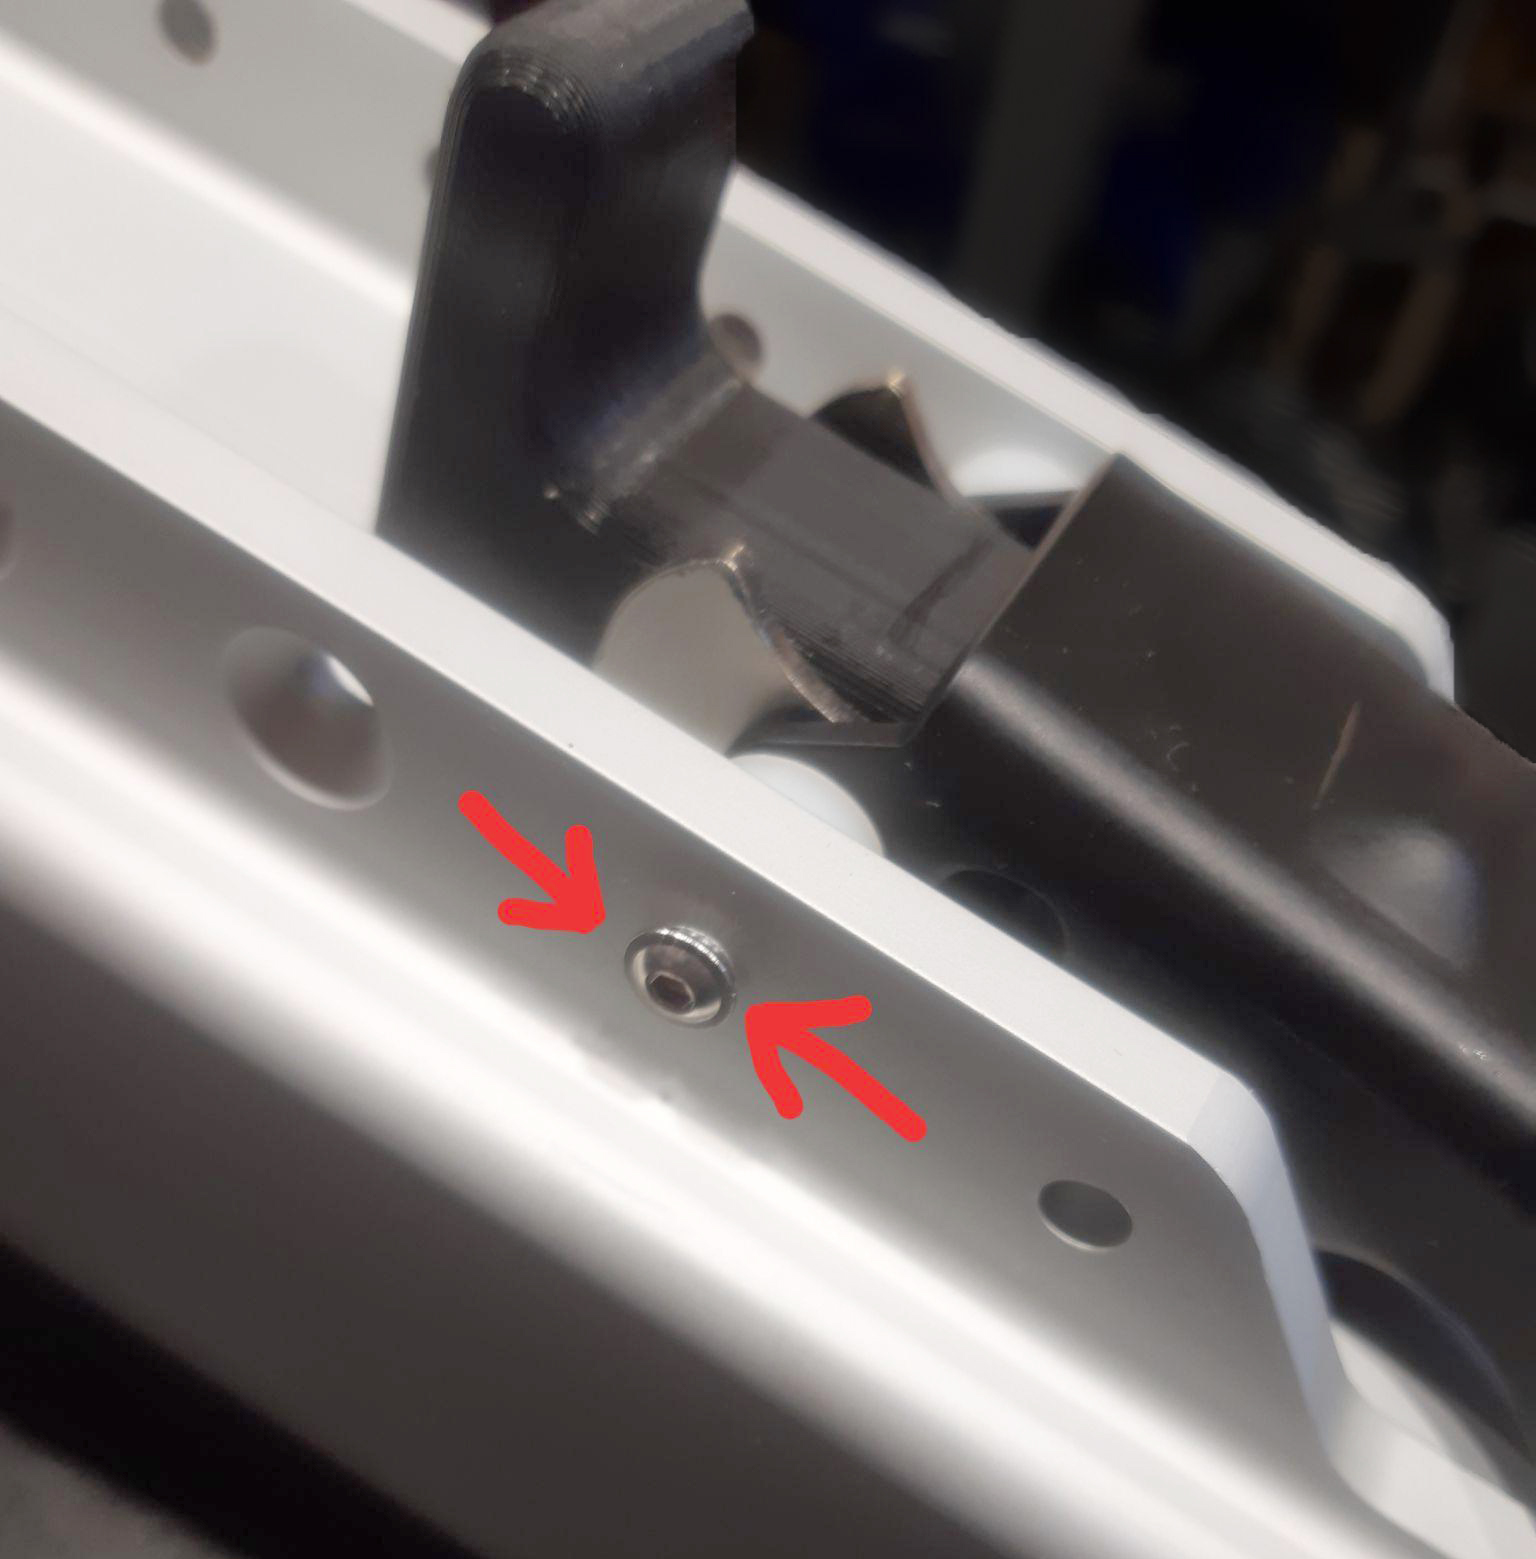
Screw-in the M3x5 flanged screw into the end of the shaft to secure the assembly into place.
Step 10
Slide out the kickstand changing tool.