How-To Replace the Tire on a Companion
Using the replacement tire program kit

Allex Laurin
Last Update il y a 2 ans
| Skill Level Required: | Technician |
| Time Required: | 30 minutes (approx.) |
WARNING: MAGNETS
Performing this service exposes high-powered magnets.
Use caution when handling the Motor Assembly and Tire Assembly as the high-powered magnets could pinch your fingers resulting in injury.
Replacing the Companion’s Tire
The following service instructions explain how to change a Companion's tire and brake pads using Cheelcare’s Tire Replacement Program Kit. The kit is available for purchase through Cheelcare or an authorized distributor.
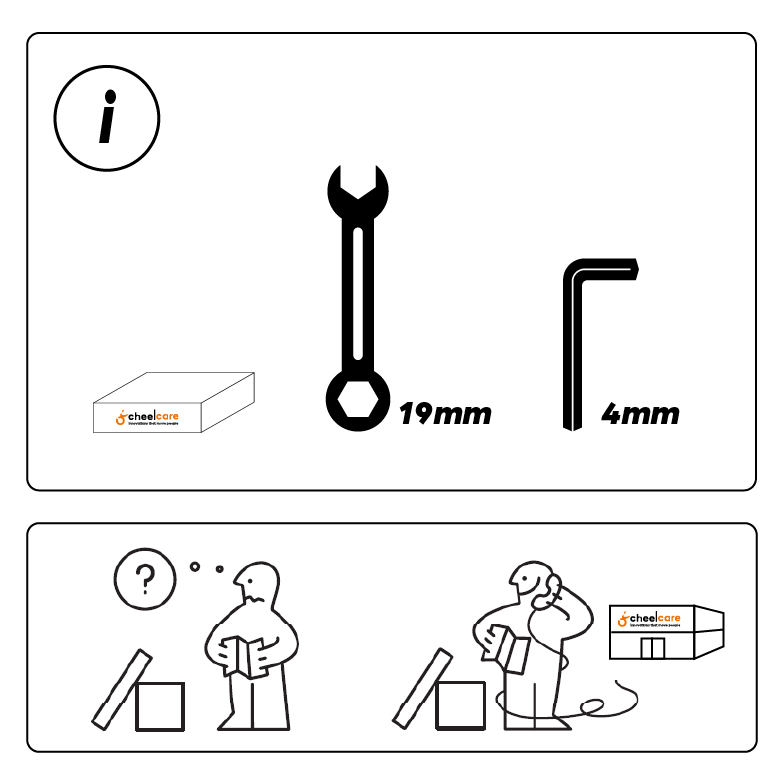
TOOLS REQUIRED
- Cheelcare Companion Tire Replacement Program Kit
- 19mm Wrench
- 4mm Allen Key
Disassembly
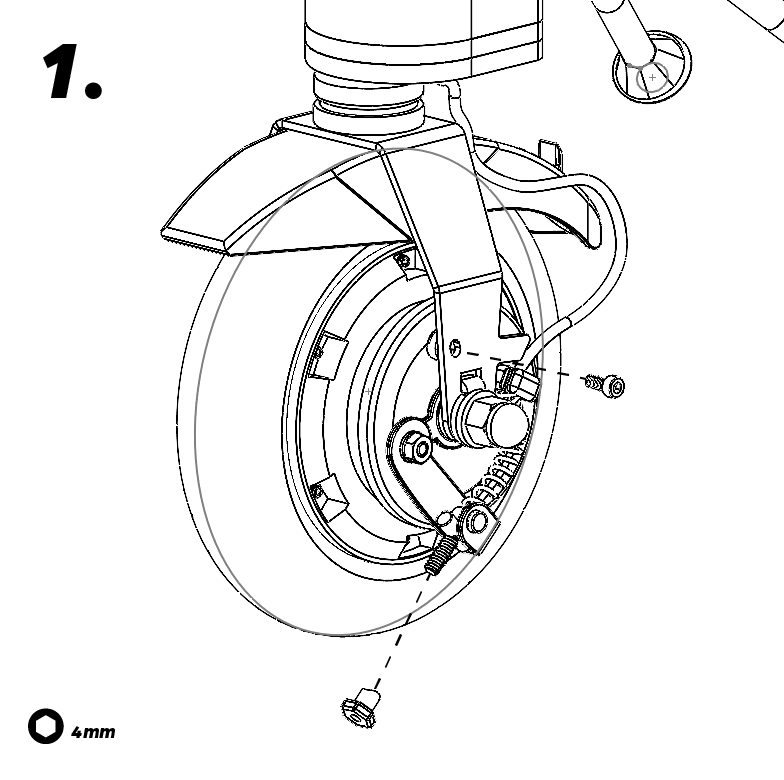
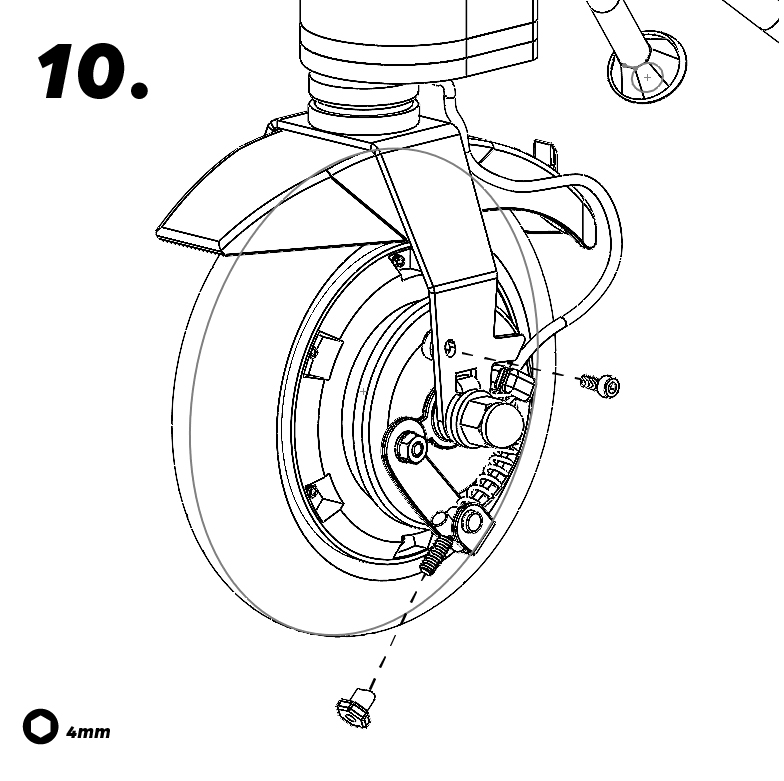
Step 1: Removing the Brake Cable and Locking Pin
- Unscrew the brake cable locking pin using the 4mm Allen Key. Reserve the pin for re-assembly.
- Unscrew the brake tension nut from the end of the brake cable assembly. Reserve the brake tension nut for reassembly.
- Remove the brake cable from the lower brake lever and reserve the spacer pin, spring and lever pin. Reserve these parts for reassembly.
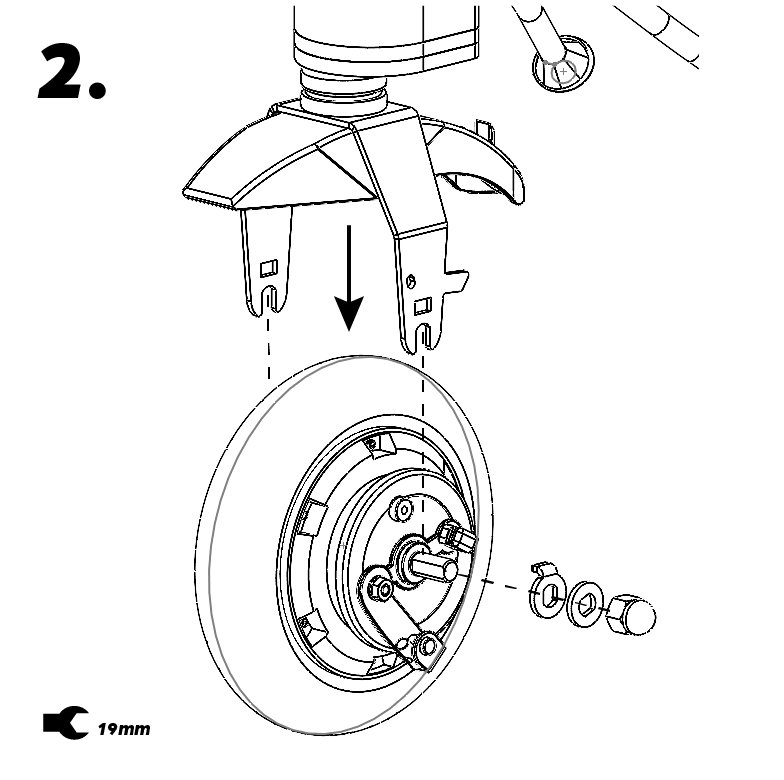
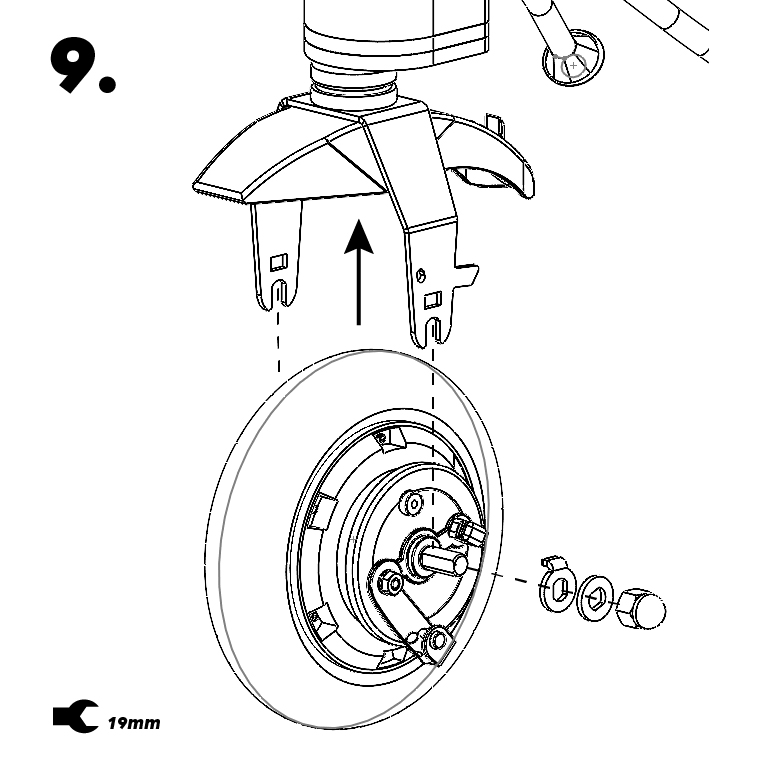
Step 2: Remove the Motor from the Fork
- Using a 19mm wrench, remove the nut from each side of the Motor. Reserve the nuts and washers for reassembly.
- Remove the Motor from the Fork.
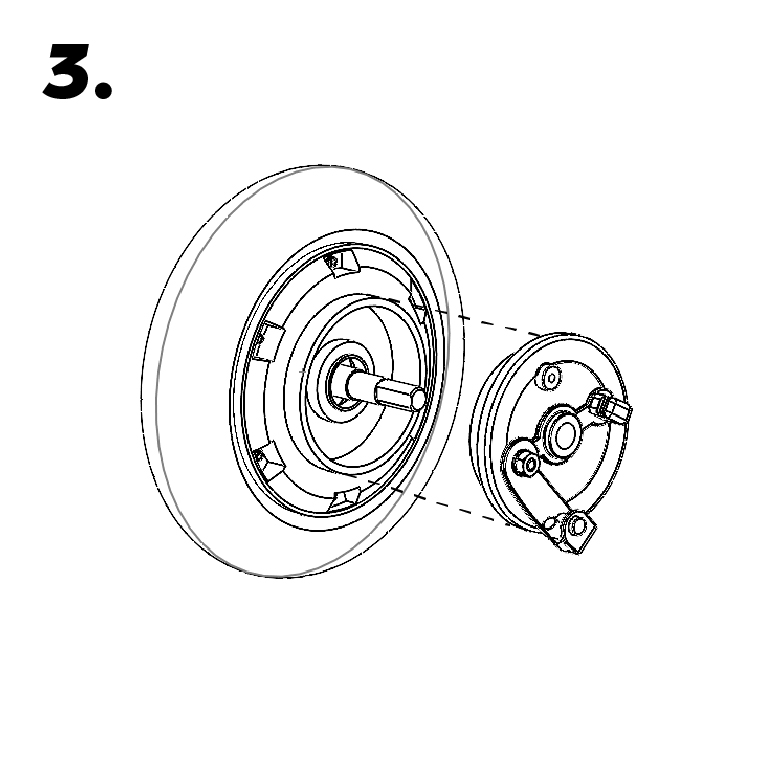
Step 3: Remove the Brake Housing
- With the Motor removed from the Fork, the brake housing can be removed from the Motor by removing it with your hands.
- Inspect the Brake Pad Assembly for wear and reserve for later assembly or discard and replace.
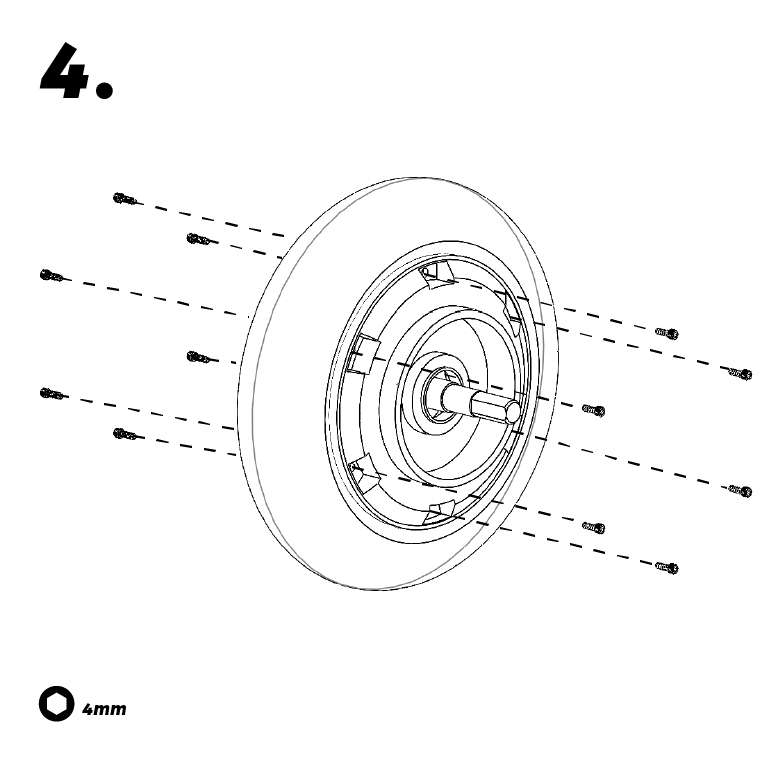
Step 4: Remove the Motor Cover
- Unscrew the six screws from the motor covers using the 4mm Allen Key. Slide the Motor Covers off the motor, exposing the motor’s inner housing.

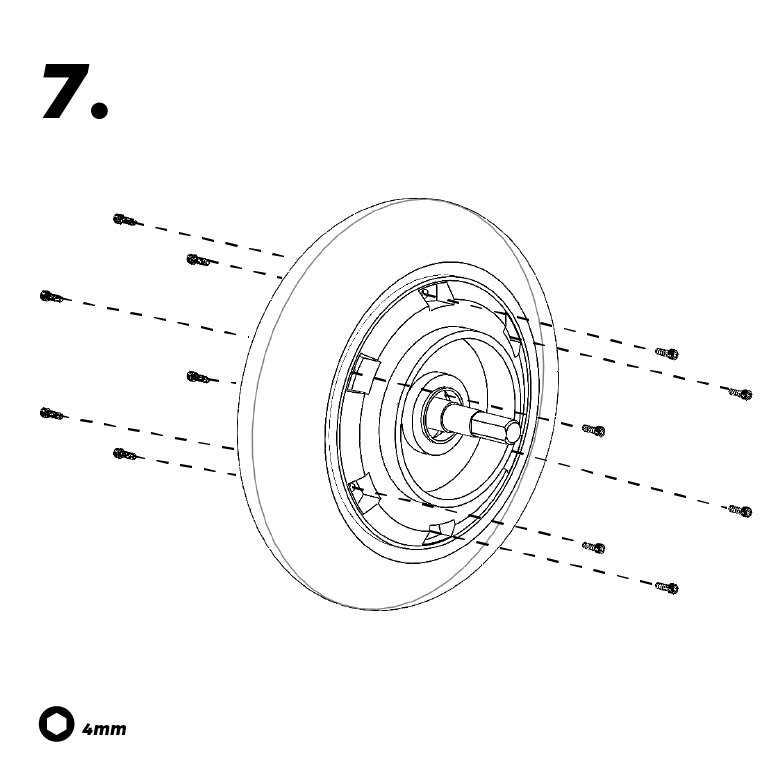
Step 5: Remove the Tire Assembly from the Motor
- With the Motor Covers removed, you can now remove the Tire Assembly from the Motor by sliding it off of the Motor’s Hub.
- Tire Assembly Replacement
- With the Tire Assembly removed from the Motor, you can now replace it with the new Tire Assembly by sliding the new assembly onto the Motor Hub.
Tire Assembly Replacement
With the Tire Assembly removed from the Motor, you can now replace it with the new Tire Assembly by sliding the new assembly onto the Motor Hub.

Swap the old tire with the new tire provided in the Tire Replacement Kit.
Apply the return shipping label to the box and contact UPS for pickup.
Reassembly
Now that the Tire Assembly has been replaced, you can now reassemble the Motor Hub Assembly and return it to the fork.
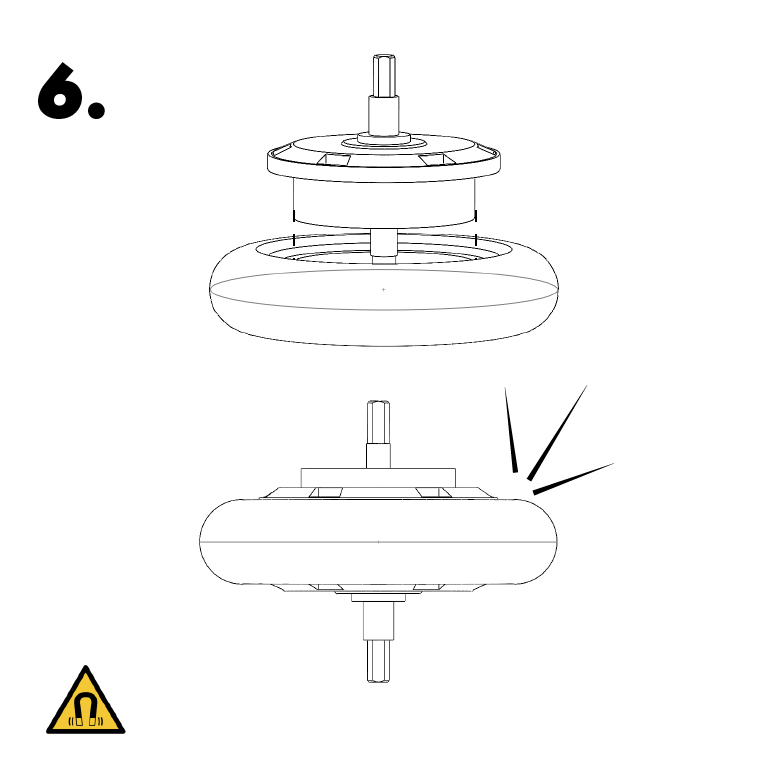
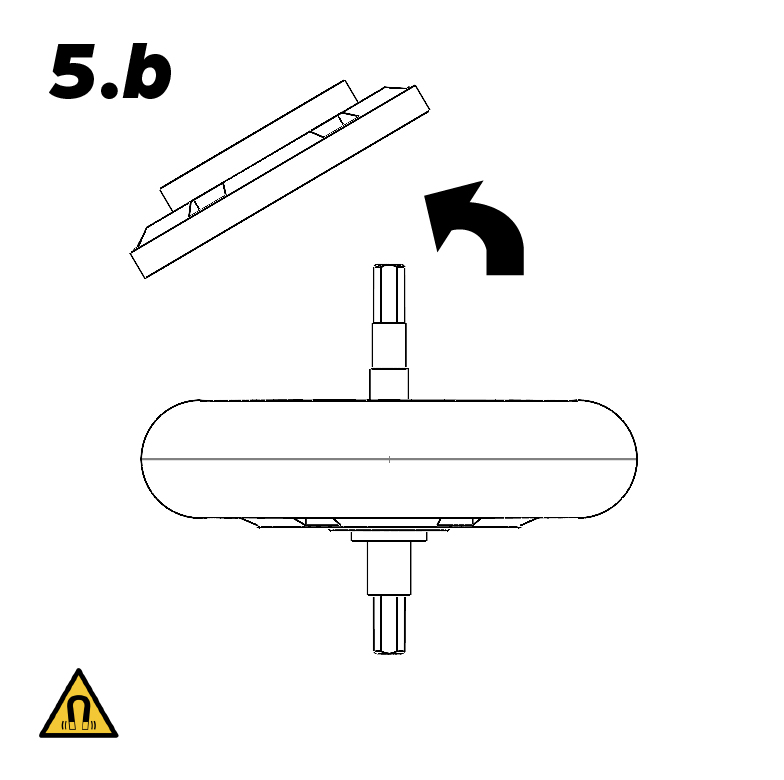
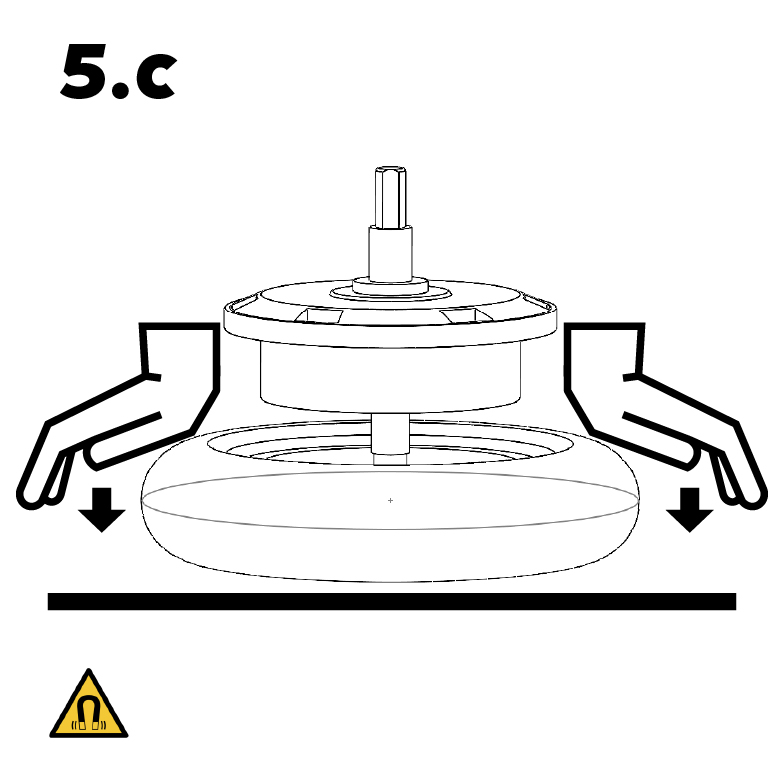
Step 6: Reattaching the Tire Assembly to the Motor Hub
Place the new tire beneath the motor and gently lift it up, allowing the motor’s magnets to snap it into place.
Caution!:
Do not place your fingers in between the magnets as they could get pinched!
Step 7: Reassembling the Motor Cover
- Slide the Motor Covers back onto the motor and secure them by screwing in the six screws using the 4mm Allen Key. Make sure the covers are securely in place, exposing the motor's inner housing.

Step 8: Reattach the Brake Pad Assembly
- Slide the brake pad assembly back onto the Motor, aligning it properly.
Step 9: Reattaching the Motor to the Fork
- Place the Motor back onto the Fork, ensuring it is properly aligned.
- Use a 19mm wrench to secure the nuts and washers on each side of the Motor. Tighten them to ensure the Motor is firmly attached to the Fork.
Step 10: Reattach the Brake Cable and Locking Pin
- Thread the brake cable back through the brake housing. Screw the brake tension nut back onto the end of the brake cable assembly. Secure the brake cable locking pin in place using the 4mm Allen Key.
Final Steps
- Double-check that all nuts, bolts, and screws are tightened securely to ensure the safety and functionality of the Companion power add-on.
- Before using the Companion, test the brakes to ensure they engage and disengage correctly. Make any necessary adjustments if the brakes aren't functioning as expected.
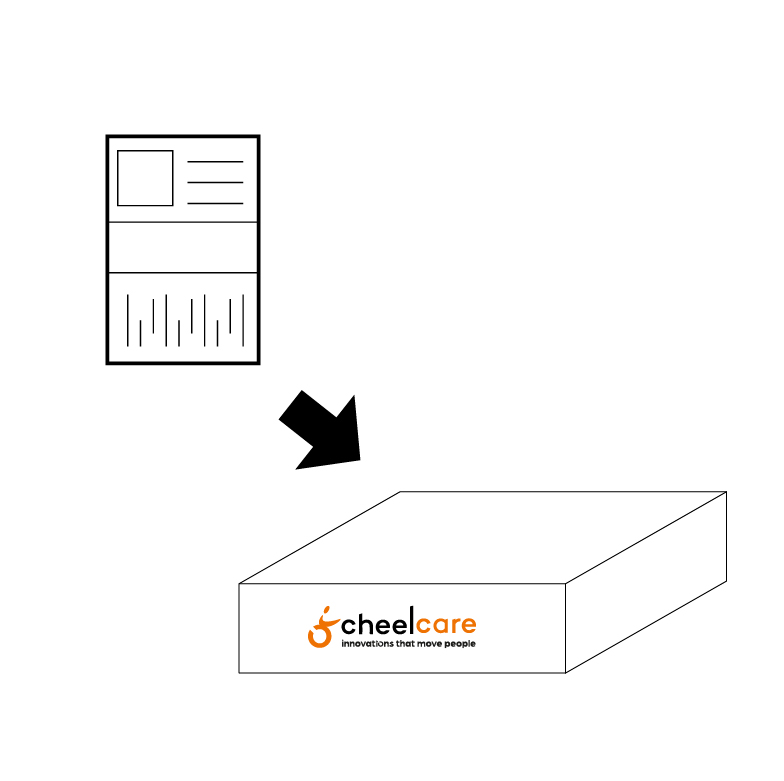
- Place the old Tire Assembly into the box that the Tire Replacement Program Kit arrived in, affix the return label provided, and ship it back to Cheelcare for recycling.
- Clean up your work area and properly dispose of any old or worn-out parts.
The Companion now has a new tire, which will improve its safety and mobility. If you encounter any issues or have further questions, contact Cheelcare or seek assistance from a qualified technician.